
Easy DIY Bike Storage for Garage – Build This in a Weekend
Super Simple DIY Bike Rack to Declutter Your Garage
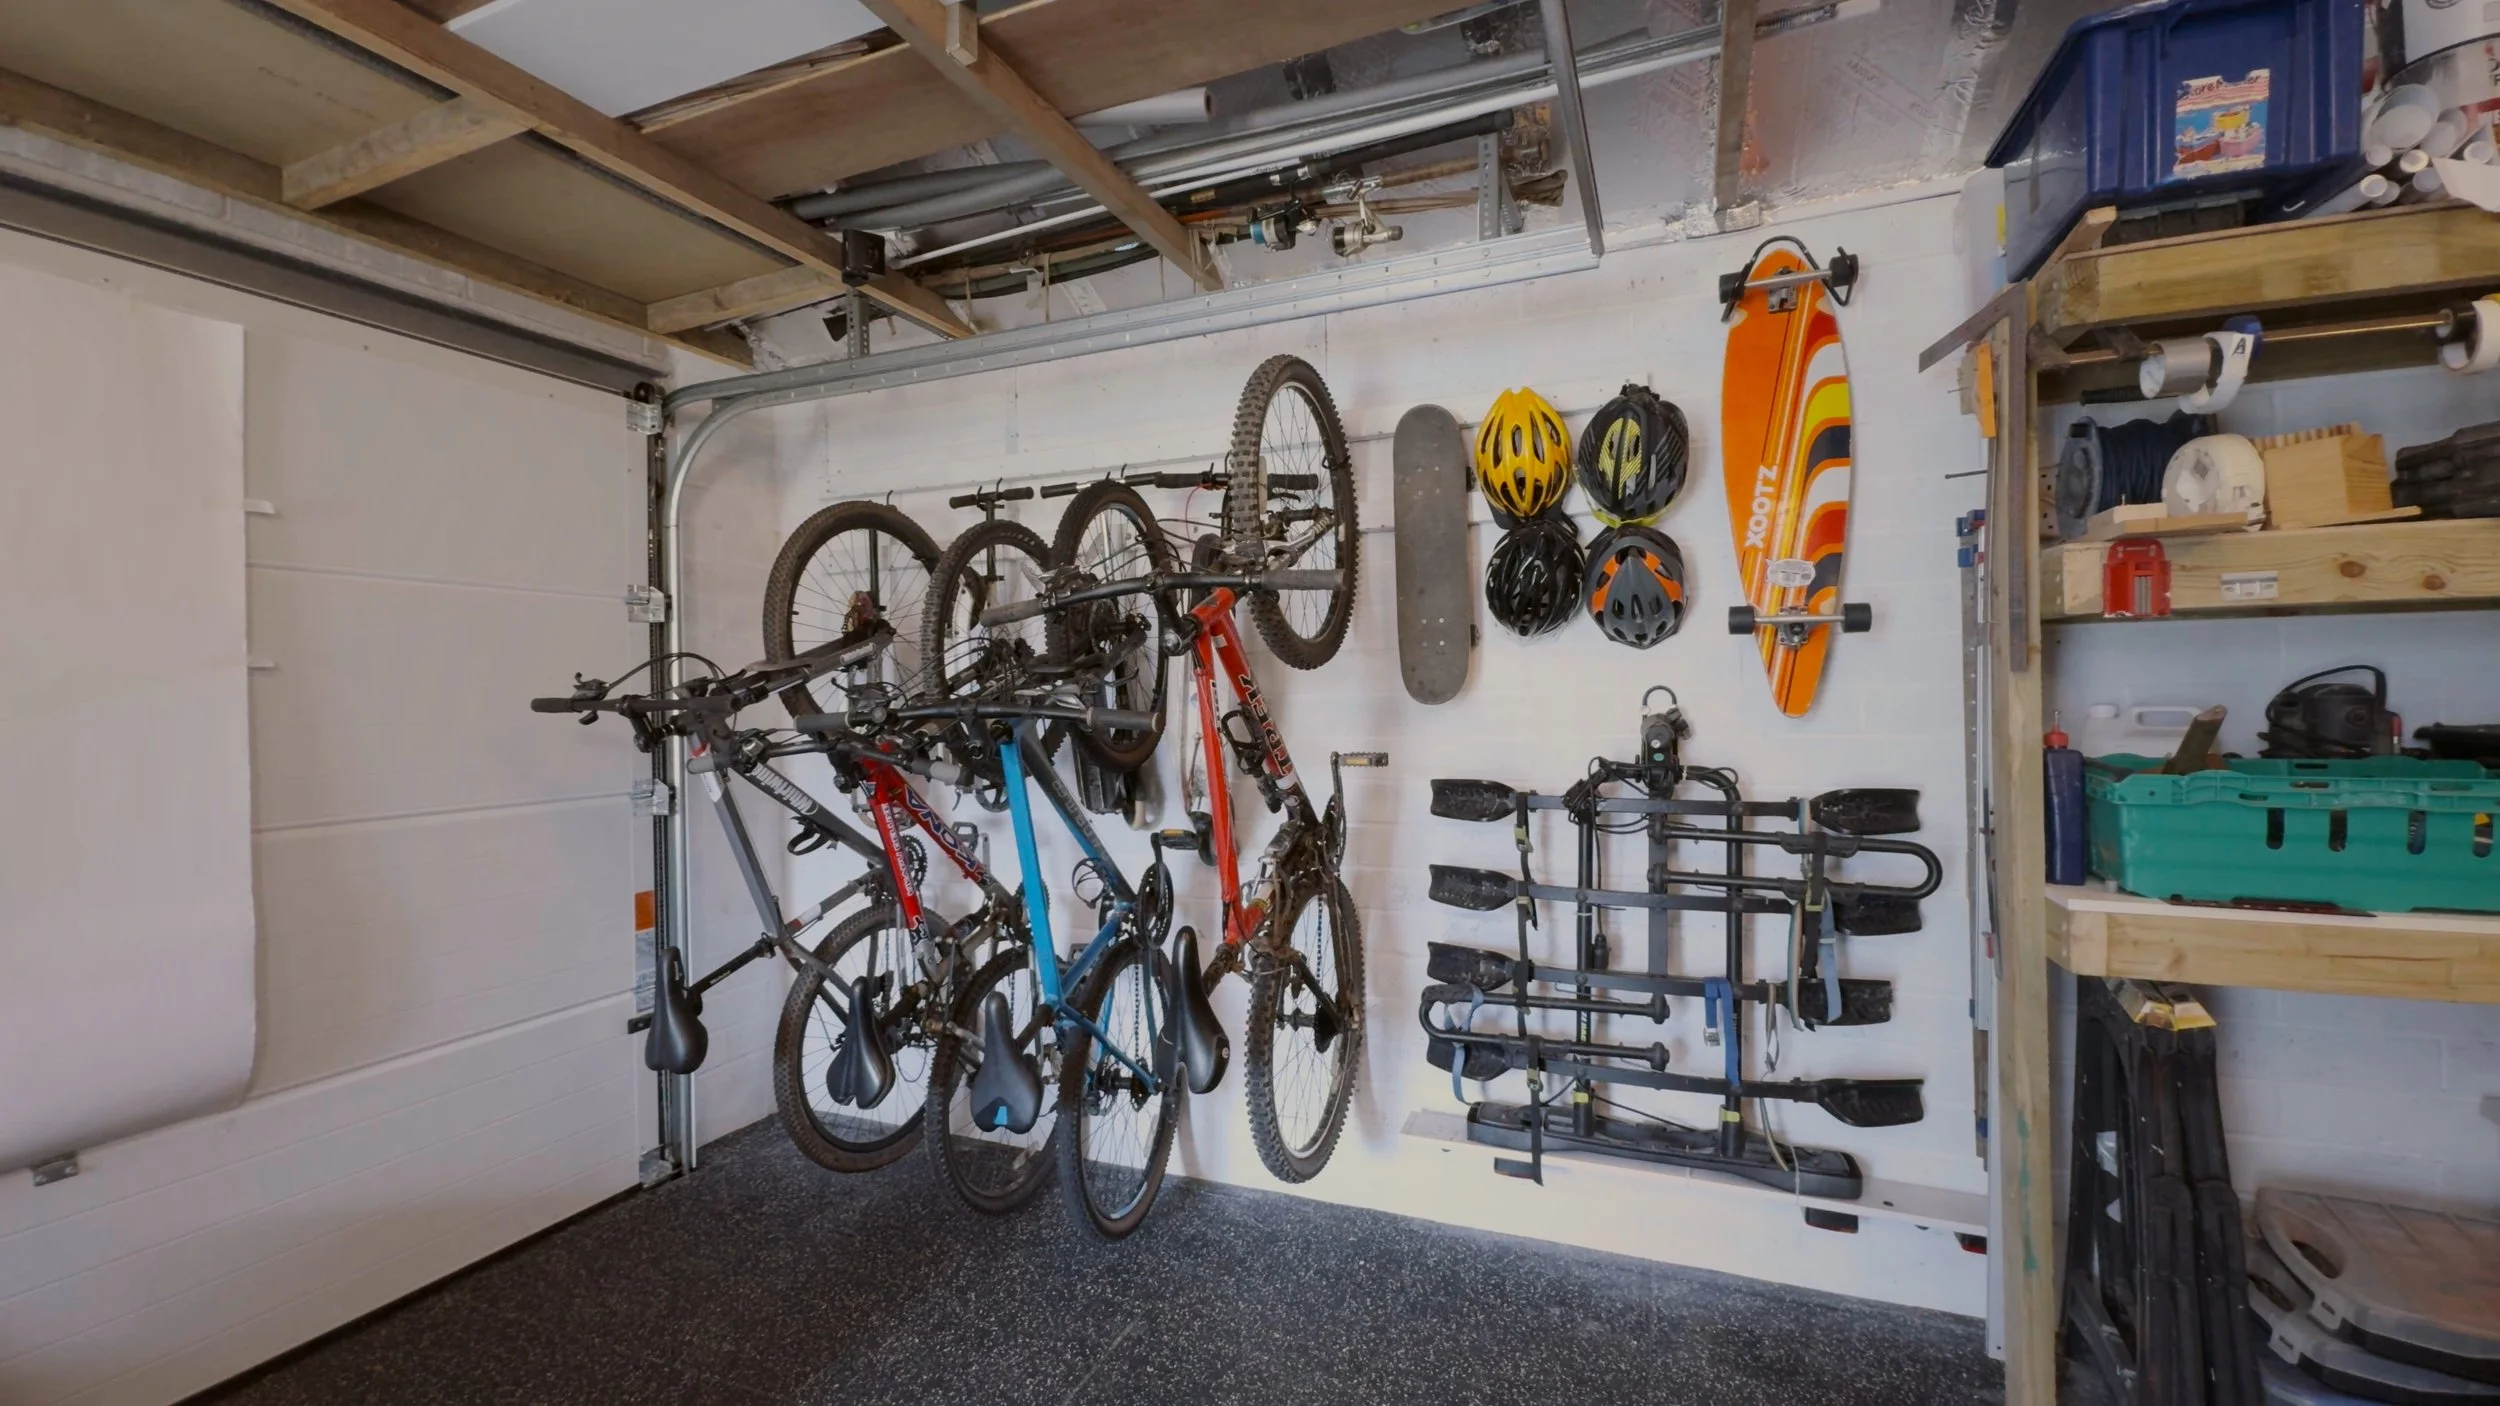
If your garage is anything like mine, bikes and scooters scattered everywhere can kill the motivation to actually use your workspace. In this post, I’ll walk you through how I built a super simple DIY bike rack using basic materials, affordable Amazon hooks, and a bit of weekend graft – all to get those bikes off the floor and make space to get making again.
Whether you’re dealing with kids' bikes, adult bikes, or a mix, this rack is customisable, affordable, and totally beginner-friendly.
Why I Built This Bike Rack
A messy garage full of clutter is frustrating – especially when it’s stopping you from getting stuck into your DIY projects. The main culprits in my case? Bikes and scooters.
So, I set out to build a simple, wall-mounted bike rack that:
Gets bikes off the floor
Declutters the space
Is adjustable over time
Costs less than £30
Is easy to build in a weekend
What You'll Need
Here’s the basic kit list:
2x4 timber – enough to span your wall space
Heavy-duty bike hooks (pack of 8) – affordable and flexible
60mm or 80mm wood screws
Wall plugs (if fixing to masonry)
Masonry drill bit (7mm)
Drill/driver and ideally an SDS drill for masonry walls
Paint (optional – I used white for a clean finish)

These are affiliate links powered by Geniuslink – I may earn a small commission if you buy through them, which helps support my content at no extra cost to you.
Step-by-Step Overview
1. Clear Your Space
Start by picking your wall and clearing the area. I chose a spot just to the left of my shelves – enough room for a few bikes without interfering with the garage door rail above.

2. Plan and Position
Using Photoshop, I mocked up where the bikes would go and how far apart they'd need to be. You can do this with pen and paper too – just make sure there's enough clearance between each bike.
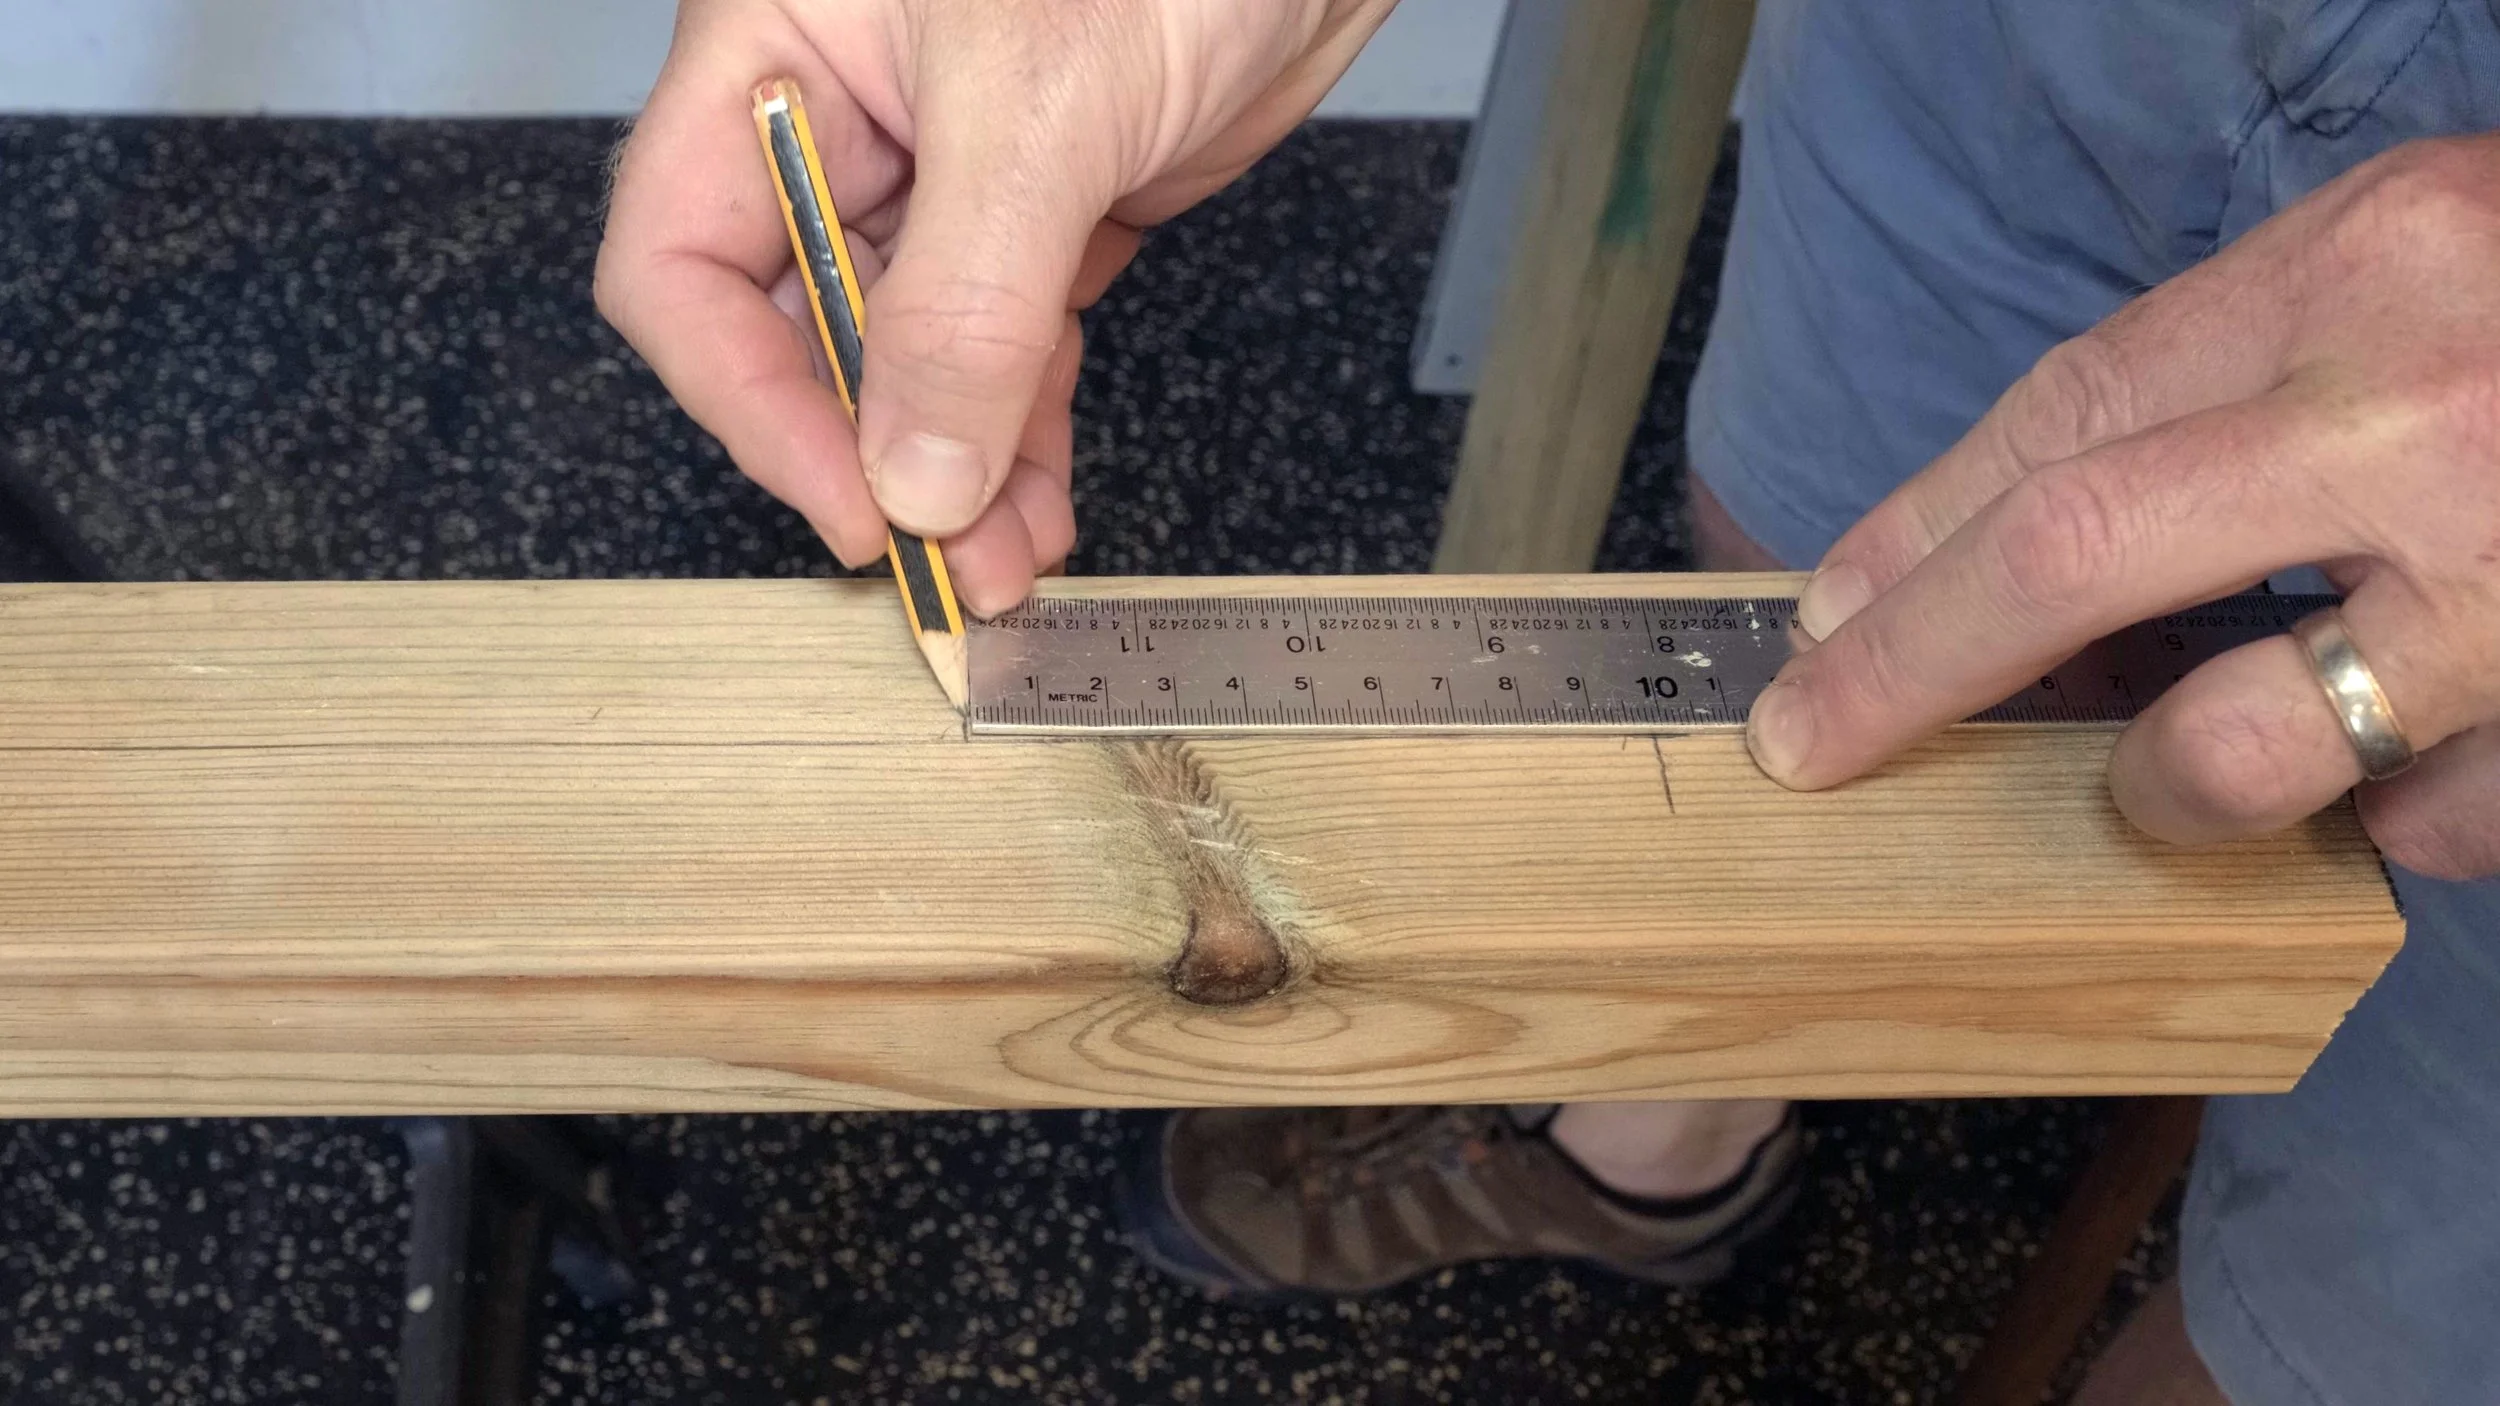
3. Drill Mounting Holes

To give flexibility, I drilled 6mm holes every 10cm along the timber. This means I can adjust hook positions later without redrilling the wall.
4. Angle the Hooks
Here’s a trick: angle your holes slightly. It makes it easier to get bikes in and out, especially on the lower row. You can bend the hooks slightly to suit your bike wheel sizes too.
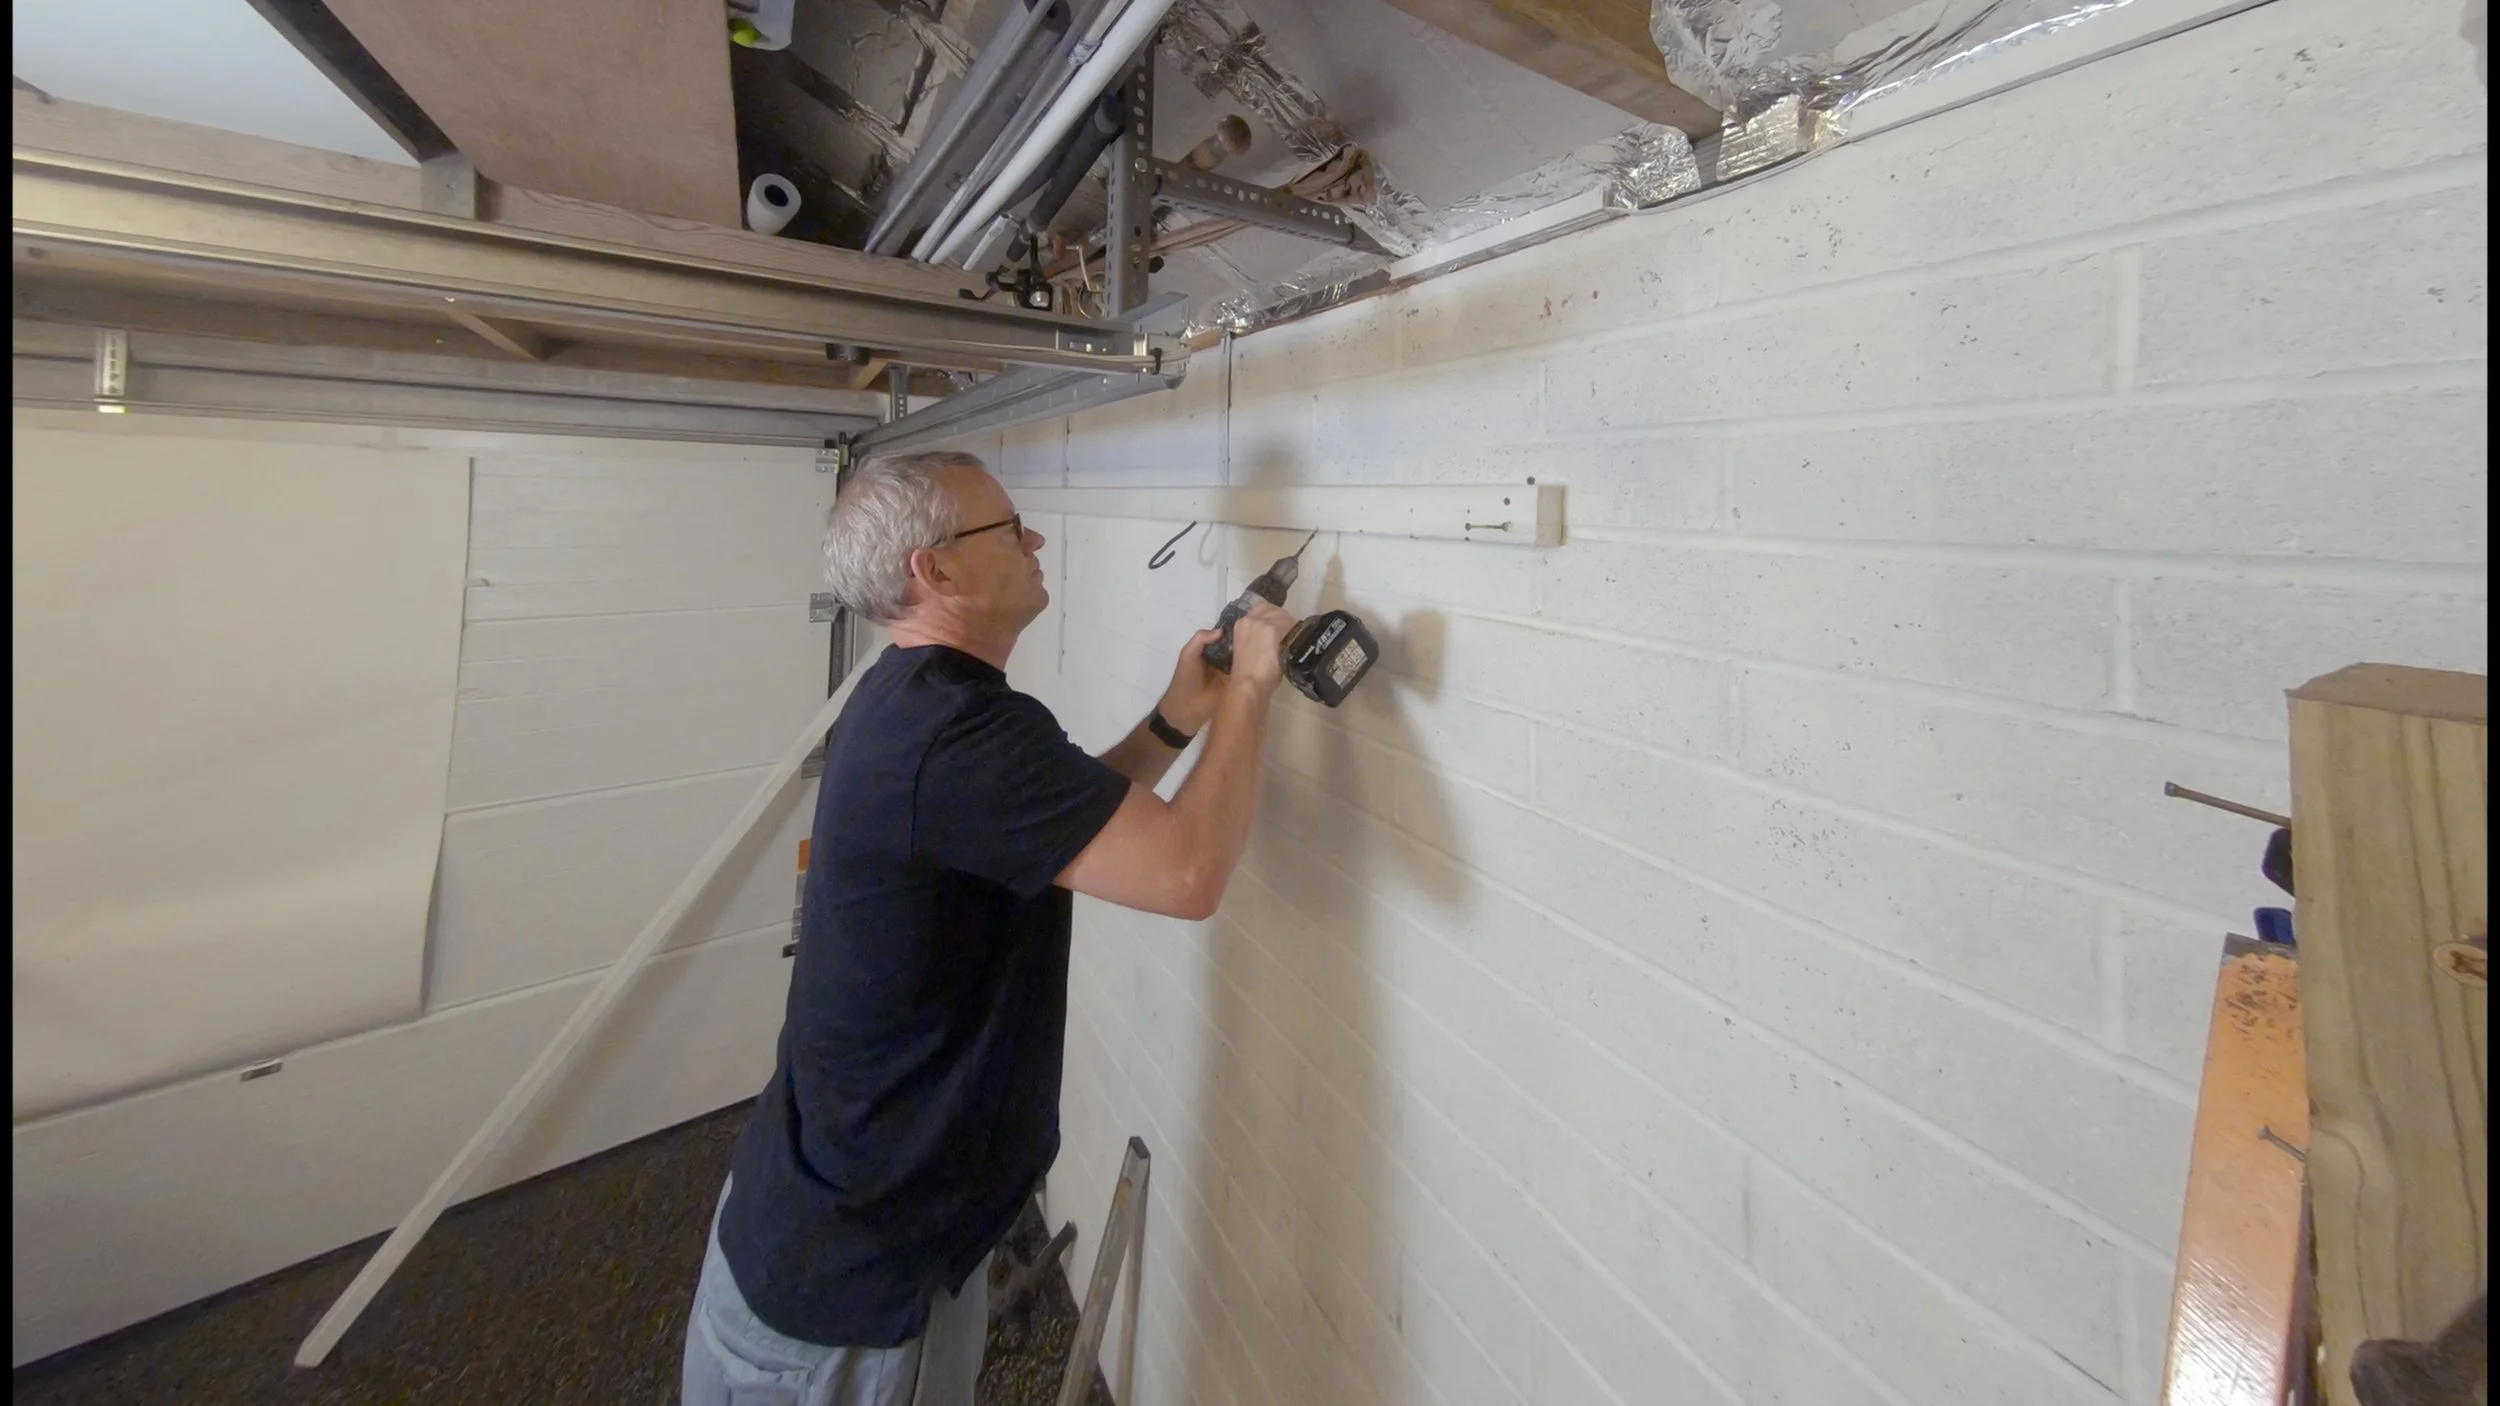
5. Mount the Rack
I used wall plugs and 80mm screws to fix the timber securely to the wall, with two fixings at each end. If you’re not drilling into masonry, you can skip the wall plugs.

6. Paint (Optional)
I gave mine a coat of white paint so it blends in with the wall, but you can go wild with colour if that’s your thing.
Why I Used These Hooks
These Amazon hooks cost just £10 for eight, and they’re easy to screw in by hand or with a spanner. They’re strong, adaptable, and perfect for this kind of DIY rack.
You can use two hooks per bike if you want them to sit on the floor rather than hang, which also helps prevent wheel sag – especially useful for heavier bikes.
Lessons Learned & Things I'd Do Differently
If you’ve got more headroom, consider putting the rack higher so bikes hang more cleanly.
The top row of hooks was slightly blocked by the timber below – I’d move the lower rail down a bit next time.
You could skip the top rail altogether if you're only planning to hang a couple of bikes.

That said, I am keeping the top rail – it’ll come in handy for hanging other stuff like helmets, bags, or even garden tools. This project is super adaptable and that’s what I love about it.
Want to Build One Too?
I've put together a free PDF that covers all the tools, materials, spacing, and tips mentioned here. Head to Buy Me a Coffee to download it. If you’re already on the newsletter list, you’ll get it shortly.
Final Thoughts
This DIY bike rack was quick to make, cost next to nothing, and has made a massive difference to my garage. I feel like making things again instead of tripping over bikes!
Check out the full build video and more DIY projects on my Fix Make YouTube channel – I’ve got loads of helpful playlists for organising your space, fixing stuff, and getting hands-on.
These are affiliate links powered by Geniuslink – I may earn a small commission if you buy through them, which helps support my content at no extra cost to you.

Things you’ll need…
2x4 timber – enough to span your wall space
Wall plugs (if fixing to masonry)
Paint (optional – I used white for a clean finish)